What Is VMware?
VMware is a platform for virtualization, enabling organizations to run multiple virtual machines on a single physical machine. VMware’s technology divides the physical resources of a server, including CPU, storage, and memory, into multiple virtual machines (VMs), each with its own operating system and applications.
VMware enhances hardware utilization and enables better management of data centers. By isolating VMs from the underlying hardware, VMware ensures that each virtual environment is independent and secure, while also allowing IT administrators to dynamically allocate resources based on demand.
Table of Contents
ToggleWhat Is Proxmox?
Proxmox is an open-source server management platform offering virtualization capabilities, particularly through Proxmox VE (Virtual Environment). This system integrates KVM hypervisor and LXC containers, management tools, and storage solutions in one platform, providing an environment for managing VMs and containers.
Proxmox offers a flexible and scalable solution for virtualization, making it suitable for enterprises seeking an alternative to proprietary solutions like VMware. Its web-based interface simplifies tasks such as VM management, network configuration, and storage administration, focusing on efficiency and ease of use.
Proxmox supports migration of virtual machines from VMware, and in 2024 introduced an automated import wizard that makes it easier to import VMs to Proxmox. We’ll provide a full tutorial showing how to carry out an automated migration.
This is part of a series of articles about VMware migration
Why Migrate from VMware?
Migration from VMware can be driven by several factors, primarily centered around cost, scalability, and strategic direction:
- Uncertainty: The acquisition of VMware by Broadcom in 2023 has raised concerns among some customers regarding potential changes to product offerings, licensing terms, and pricing models.
- Cost: As a proprietary solution, VMware has a high license cost, especially for large-scale deployments. Many organizations are considering cost-effective alternatives like Amazon EC2, Microsoft Hyper-V, KVM, and Proxmox.
- Scalability: VMware is technically suitable for large scale environments, but its cost structure can impose limitations on its scalability in a business environment.
Two Ways to Migrate VMware VM to Proxmox
VMware workloads can be moved to Proxmox manually or via a new import wizard, a new feature introduced by Proxmox in 2024.
Using the Proxmox Import Wizard
The Proxmox VE platform offers an integrated VM Import Wizard, introduced in version 8, to enable the migration from VMware ESXi to Proxmox. This wizard provides a simple interface for IT administrators to import VMware virtual machines. It integrates with Proxmox’s storage plug-in system, enabling smooth interaction with VMware’s APIs.
The import wizard supports the reuse of storage configurations and includes advanced options for customizing the import. Administrators can select VMs to import and adjust various settings, such as assigning new ISO images for CD-ROM drives, choosing different storage targets for each disk, configuring network hardware models or bridges, and excluding devices from the import.
Manually Migrating from VMware to Proxmox
The manual migration method, while more complex, enables more customization and control over the migration process. This approach is suitable for environments where specific configurations or detailed adjustments are required.
The manual migration process involves:
- Enabling SSH access on the VMware ESXi host, which allows for secure command-line access to the server.
- Locating the storage path of the virtual machine to be migrated, ensuring the user’s machine has access to the VM’s files.
- Using a tool like WinSCP to transfer VM files (in particular VMDK files) from the VMware ESXi host to the Proxmox server.
- Creating a new virtual machine in Proxmox. During this creation process, it’s important to set the correct BIOS settings, typically UEFI (OVMF), and configure the hard disk drive type to match the original VM’s setup.
- Importing the transferred disk files into Proxmox. The imported disk is then attached to the new VM, and the boot order is configured to prioritize this disk.
- Starting the new VM in Proxmox, and verifying the migration’s success by ensuring it operates correctly in its new environment.

Lanir specializes in founding new tech companies for Enterprise Software: Assemble and nurture a great team, Early stage funding to growth late stage, One design partner to hundreds of enterprise customers, MVP to Enterprise grade product, Low level kernel engineering to AI/ML and BigData, One advisory board to a long list of shareholders and board members of the worlds largest VCs
Tips from the Expert
In my experience, here are tips that can help you migrate from VMware to Proxmox effectively:
-
Choose between automated and manual migration
Use the Proxmox Import Wizard for simplicity or follow manual steps for more control over configurations.
-
Ensure compatibility of VM settings
Align VM configurations, such as BIOS and network settings, between VMware and Proxmox to prevent compatibility issues.
-
Back up VMs before starting
Always perform full backups to prevent data loss during the migration.
-
Optimize storage and networking in advance
Set up storage and network environments that match Proxmox’s requirements.
-
Test all migrated VMs thoroughly
Run functionality and performance tests to ensure all VMs operate smoothly in Proxmox.
Tutorial: Automatic Import of Full VM from VMware to Proxmox
Proxmox VE supports importing virtual machines (VMs) from VMware ESXi. This feature has been tested with ESXi versions ranging from 6.5 to 8.0. While there are plans to extend support to other formats like OVAs/OVFs in the future, as of now, the import functionality is limited to VMware ESXi.
Note: VMs with disks on VMware vSAN storage cannot be imported directly. The hard disks must be moved to another storage location before initiating the import. Importing VMs with existing snapshots may result in slower transfer speeds.
Automatic ESXi Import: Step by Step
To import VMs from an ESXi instance into Proxmox VE, follow these steps:
- Verify that your Proxmox VE is version 8 or above and ensure the latest system updates are applied to Proxmox VE.
- Navigate to Datacenter, then Storage, and select Add.
- Choose the ESXi option and enter the domain or IP address along with the credentials of an admin account.
- If using a self-signed certificate, either add the CA to your system trust store or select the Skip Certificate Verification option.
- Select the newly added ESXi storage from the resource tree on the left side of the Proxmox VE interface.
- Verify that the import panel displays all available VMs.
- Select the desired VM and click the Import button at the top.
- Specify the target storage for the VM’s disks and the network bridge for the network device.
- Click the Advanced tab to configure more detailed settings:
- Assign new ISO images for CD-ROM drives.
- Select different storage targets for each disk if multiple disks are involved.
- Configure different network hardware models or bridges for multiple devices.
- You disable the import of certain disks, CD-ROM drives, or network devices.
- Review the Resulting Config tab for the complete list of key-value pairs that will be used to create the VM.
- To prepare for import, ensure the VM on the ESXi side is powered down to maintain a consistent state.
- Initiate the import process on Proxmox VE.
- Boot the VM in Proxmox VE and check for any changes required post-migration.
Live Import
Proxmox VE also enables live import, allowing the VM to start during the import process. This involves importing essential hard disk data needed by the guest operating system initially, with the remaining data being imported asynchronously.
Live import reduces downtime but slightly affects I/O performance at the start. The extent of the performance impact depends on factors such as storage performance, network bandwidth, and the guest OS workload. In the event of an import failure, any data written since the import started will be lost, so it’s recommended to test this method first.
Best Practices for Migrating from VMware to Proxmox
Organizations can implement the following steps to ensure successful migration from VMware to Proxmox.
Pre-Migration Planning
Before beginning the migration process, conduct thorough planning to avoid potential issues and ensure a smooth transition. Evaluate the current VMware environment, noting all virtual machines (VMs), their configurations, and dependencies. Document the network settings, storage configurations, and any specific requirements of each VM.
Consider the timing of the migration to minimize disruption. Choose a maintenance window that causes the least impact on business operations. Communicate the planned downtime and potential risks to all stakeholders to ensure everyone is prepared for the migration process.
Application Dependency Mapping
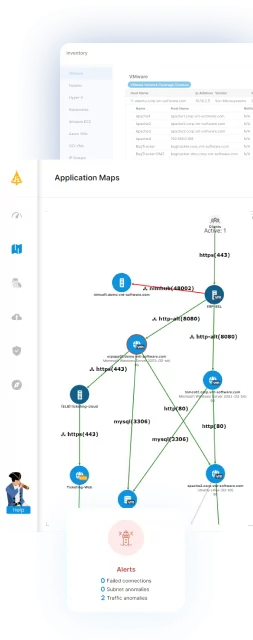
Understanding the interdependencies between applications and services running on VMs is crucial for a smooth migration. Create a detailed map of application dependencies, including databases, middleware, and external services. This mapping helps in identifying critical connections and ensuring they remain intact post-migration. Tools like application performance monitoring (APM) software can assist in visualizing these dependencies.
During the migration, it’s essential to maintain the integrity of these dependencies. Plan the sequence of VM migrations to ensure dependent applications are migrated in an order that minimizes downtime and maintains functionality. Validate that all dependencies are correctly configured in Proxmox after migration to avoid any service disruptions.
Backup and Testing
Ensure that all VMs and critical data are backed up using reliable backup solutions. This precaution protects against data loss in case of any migration failures.
After backups are secured, conduct a trial migration with a test VM or a less critical system. This test run helps identify any potential issues in the migration process, allowing them to be addressed beforehand. Verify the functionality and performance of the test VM in Proxmox to ensure it meets the required standards.
Network and Storage Configuration
The network and storage configuration affects the stability and performance of migrated VMs. Start by mapping out the network settings from VMware to Proxmox. Ensure that the network bridges, VLANs, and IP addresses are accurately replicated. This step is important to maintain connectivity and avoid network conflicts.
Review the storage configuration in VMware and replicate it in Proxmox. Proxmox supports various storage types, including local storage, network-attached storage (NAS), and storage area network (SAN). Choose the storage solution that best fits the organization’s needs and configure it to match the original setup in VMware.
Cluster and High Availability Setup
Setting up clusters and high availability (HA) in Proxmox ensures that the virtualized environment is resilient and can withstand failures. Begin by creating a Proxmox cluster (if there are multiple Proxmox nodes). This setup enables resource sharing, load balancing, and centralized management.
For high availability, configure Proxmox’s HA features to automatically restart VMs on another node in case of a node failure. This configuration minimizes downtime and ensures business continuity. Test the HA setup thoroughly to verify that it works as expected and that VMs are easily transferred to other nodes during failures.
Related content: Read our guide to application migration
VMware and Proxmox Migration Made Easy with Faddom
Faddom’s application dependency mapping provides critical information you’ll need before migrating VMware workloads, automatically discovering all VM instances and their dependencies. Faddom is agentless and doesn’t require credentials to scan your environment. It is cheap, starting at $10K/year, and maps the entire environment in real-time, automatically updating maps 24/7. One person can map an entire data center in an hour.
Learn more about Faddom for data center migration or try it yourself with a free trial!
