What Is the Lansweeper Agent (LsAgent)?
LsAgent is a lightweight application that collects inventory data directly from Windows, macOS, and Linux devices. Instead of relying on agentless scanning, which can struggle with mobile assets, remote machines, or devices in restricted zones, LsAgent runs locally and ensures those endpoints are still included in your asset inventory.
The agent sends the collected data back to Lansweeper in two possible ways: either through a direct push to the Lansweeper server or via Lansweeper’s cloud relay service. The relay option encrypts and stores the data in a secure environment until the server retrieves it.
By running on the device itself, LsAgent avoids common scanning obstacles such as missing credentials, network restrictions, or firewalls. This makes it a practical solution for keeping accurate inventory of assets that are otherwise hard to scan.
Table of Contents
ToggleLsPush vs. LsAgent Scanning Agent
Lansweeper offers two scanning agents: LsPush and LsAgent. Both work by collecting data locally on the client machine and sending it back to the Lansweeper installation, but their capabilities and use cases differ.
LsAgent is the preferred option because it supports Windows, Linux, and macOS devices, while LsPush only works on Windows. Unlike LsPush, LsAgent can securely transmit data over the internet, making it suitable for laptops or remote devices outside the corporate network. It installs as a permanent service, supports scheduled scans, and can update itself automatically on Windows.
LsPush remains useful in limited scenarios. It does not require installation, which makes it easy to deploy via logon scripts or group policies for user logon tracking. However, it lacks cross-platform support, secure internet communication, and automated scheduling.
Related content: Read our guide to Lansweeper alternatives
How Lansweeper Agent Works
Once installed on a Windows, Linux, or macOS device, LsAgent runs as a background service that automatically scans the machine once per day. The scan schedule is configurable in the Lansweeper web console, which also displays the collected data.
The agent can deliver inventory data in two ways. If the device has a direct connection to the Lansweeper server (for example, on the same network or over VPN), the data is sent straight to the scanning server using the server name and port defined during installation. If a direct path is not available, LsAgent can instead use Lansweeper’s relay server in Microsoft Azure. In this case, the agent sends encrypted data over HTTPS (TLS 1.2), which is stored securely until the Lansweeper server retrieves it. Once downloaded, the relay server deletes the stored data.
Relay connectivity is disabled by default and must be explicitly enabled in the web console. When enabled, the Lansweeper scanning server periodically checks the relay server over port 443 for new data tied to the organization’s unique key.
Because LsAgent scans locally, it avoids many of the issues seen in agentless methods. It does not require administrative credentials, is unaffected by inbound firewall rules, and bypasses common errors like access denied messages.

Lanir specializes in founding new tech companies for Enterprise Software: Assemble and nurture a great team, Early stage funding to growth late stage, One design partner to hundreds of enterprise customers, MVP to Enterprise grade product, Low level kernel engineering to AI/ML and BigData, One advisory board to a long list of shareholders and board members of the worlds largest VCs
Tips from the Expert
In my experience, here are tips that can help you better leverage Lansweeper Agent (LsAgent) in complex IT environments:
-
Use dual-channel failover for critical assets: Configure both direct-to-server and relay fallback for critical or remote endpoints. This hybrid setup ensures asset inventory continuity even when VPNs or local network routes are disrupted.
-
Create dynamic agent deployment groups via AD OUs
Automate LsAgent rollout based on Active Directory Organizational Units (OUs) to target user departments, roles, or device types, simplifying staged deployment and ongoing targeting. -
Tag assets with scan method metadata: Tag scanned assets with their method (LsAgent, LsPush, or agentless) using custom fields. This improves inventory transparency and allows targeted analysis of scan coverage gaps or method-specific discrepancies.
-
Audit LsAgent relay data flow for compliance mapping: For regulated environments, log and review relay interactions (including when, what, and how much data flows through Azure endpoints) to demonstrate compliance with data residency or audit policies.
-
Schedule deeper LsAgent scans for low-visibility devices: Increase scan frequency for mobile, kiosk, or remote worker endpoints where inventory drift or environmental changes occur rapidly, using scan intervals under 6 hours when practical.
Quick Tutorial: Installing LsAgent
Installing LsAgent on a Windows computer is straightforward but requires a few preparations. The machine must have .NET Framework 4.8 or higher installed. If you plan to use the cloud relay, ensure that your Lansweeper scanning server can make outbound HTTPS connections on port 443 to lsagentrelay.lansweeper.com. Relay access must also be enabled in the Lansweeper Classic web console, where you can copy the Cloud Relay Authentication Key used during setup.
The Windows installer is available either from your Lansweeper server under Program Files (x86)\Lansweeper\Client or from the Lansweeper download page. Running the installer lets you choose an installation directory and then configure how the agent connects. You can provide:
-
- The scanning server name or IP and listening port (default 9524).
-
- The Cloud Relay Authentication Key.
Installing LsAgent follows the same basic process on Windows, Linux, and macOS, with platform-specific installers available from the Lansweeper download page.
1. Prepare the environment
-
- Ensure the machine meets requirements (.NET Framework 4.8 or higher on Windows, .NET 6.0 support on Linux and macOS, or use the legacy installer if needed).
-
- If using the cloud relay, allow outbound HTTPS connections on port 443 to lsagentrelay.lansweeper.com.
-
- Enable relay access in the Lansweeper web console and copy the Cloud Relay Authentication Key.
2. Run the installer
-
- Download the installer for the target OS.
-
- Launch the installer and choose the installation directory.
-
- Provide connection details:
-
- Scanning server name/IP and listening port (default 9524).
-
- Cloud Relay Authentication Key, if you want the device to communicate through the relay.
-
- If both are supplied, LsAgent tries the scanning server first and uses the relay as fallback.
3. Complete setup
-
- Finish the installation. LsAgent starts immediately and performs a daily scan by default.
-
- The asset appears in the Lansweeper web console, where you can verify that it was scanned via LsAgent.
4. Configure scanning
-
- In the web console, adjust schedules under Scanning > LsAgent Scanning.
-
- Group devices, define scan intervals (minimum one hour), and assign multiple scanning servers for redundancy.
-
- If all assigned servers are unavailable, and a relay key was configured, data is sent to the relay until retrieved.
Key Limitations of Lansweeper
While Lansweeper provides strong asset discovery and inventory features, there are several limitations that can affect usability and adoption in different environments. These limitations were reported by users on the G2 platform:
-
- Limited feature coverage: It does not natively include patch management, software metering, or broader Windows management tasks, which require separate tools.
-
- Stale data and delays: Cached information can be difficult to clear, and new scan data may take hours to appear.
-
- Cloud-only development: Most new features are developed only for the cloud instance, leaving the on-premises version with few major improvements.
-
- Data sovereignty concerns: The cloud instance requires sending data to AWS in Ireland, which can conflict with regional compliance requirements.
-
- Complex reporting: On-premises reporting is tied to database relationships and SQL queries, which can be challenging for teams without SQL knowledge.
-
- Weak support: Support is limited to knowledge base articles and videos. Direct technical support is slow, often unresponsive, and typically routed through sales.
-
- Admin panel usability: The interface can feel cluttered and unintuitive, with limited customization options for dashboards and roles.
-
- Scalability issues: The licensing jump from 100 free assets to a 2000-asset paid tier is steep, making it less cost-effective for smaller deployments.
-
- Remote and user tracking gaps: The platform struggles with up-to-date reporting for remote users, sometimes failing to correctly associate machines with their last users.
-
- Deprecated remote access: The built-in remote control tool (lsremote) was deprecated, and its performance was unreliable even before removal.
Faddom: Ultimate Agentless Alternative to Lansweeper
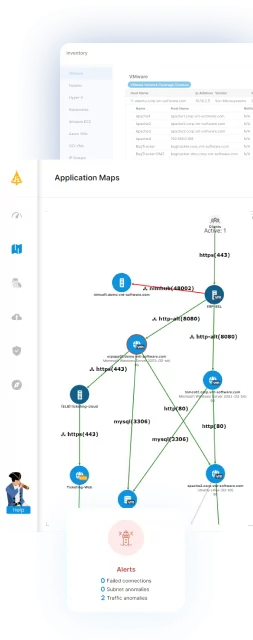
If your organization requires complete and continuous visibility across hybrid environments but wants to avoid deploying agents, Faddom’s IT mapping is a modern alternative worth considering. It automatically discovers and maps servers, business applications, and dependencies across both on-premises, cloud, and hybrid environments, all without the need for credentials, agents, or causing any network disruptions.
Faddom keeps IT documentation accurate and up-to-date in real time, helping teams identify hidden dependencies, track changes, and maintain control of complex infrastructures. It simplifies asset management, enhances audit readiness, and supports accurate decision-making across IT operations and security.
If you are looking for an agentless platform to complement or replace traditional scanning tools, book a demo with our experts and see how Faddom can assist you!